Showing posts with label Nail Art. Show all posts

Tuesday, 23 September 2014

Getting Fed Up Yet? Three Wave Skittle Manicure.


Three wave manicures are just that easy! Sorry they've appeared a lot recently on the blog but there's no real brains required behind this nail art design. The only thing you need is three nice colours. Yet there is a difference in today's version of the three wave manicure as there may be some accent nails which contain dots, follow me if you'd like to see some more... 

Tuesday, 9 September 2014

Simple Nail Art - Three Waves!


Nail art is making an appearance! Despite it being relatively simple, it's still a current favourite. It's been heavily featured lately on instagram (found here and here) as it's easy peasy and has a fabulous effect. Only ingredients you guys need is three polishes which have a curved edge (this makes it effortless, but if you only have flat edges you'll need an additional dotting tool) that are opaque on top of each other. Then all you need to do is copy the design below, there's no brains required. If you're interested take a further look: 

Thursday, 24 July 2014

A litte dotty nail art: Grey Matter and Blue Eyed Girl by Rimmel with Kiwi by Barry M


The last two or three days has been lovely weather so much so that I've been sat outside in the sun doing work instead of wasting the summer sun by sitting inside. And today's nail polish post has been no exception to the new work space. It probably inspired the manicure rather than hindering it. So let's get into detail over today's nail art!

Tuesday, 24 June 2014

Easy nail art: Three Waves.

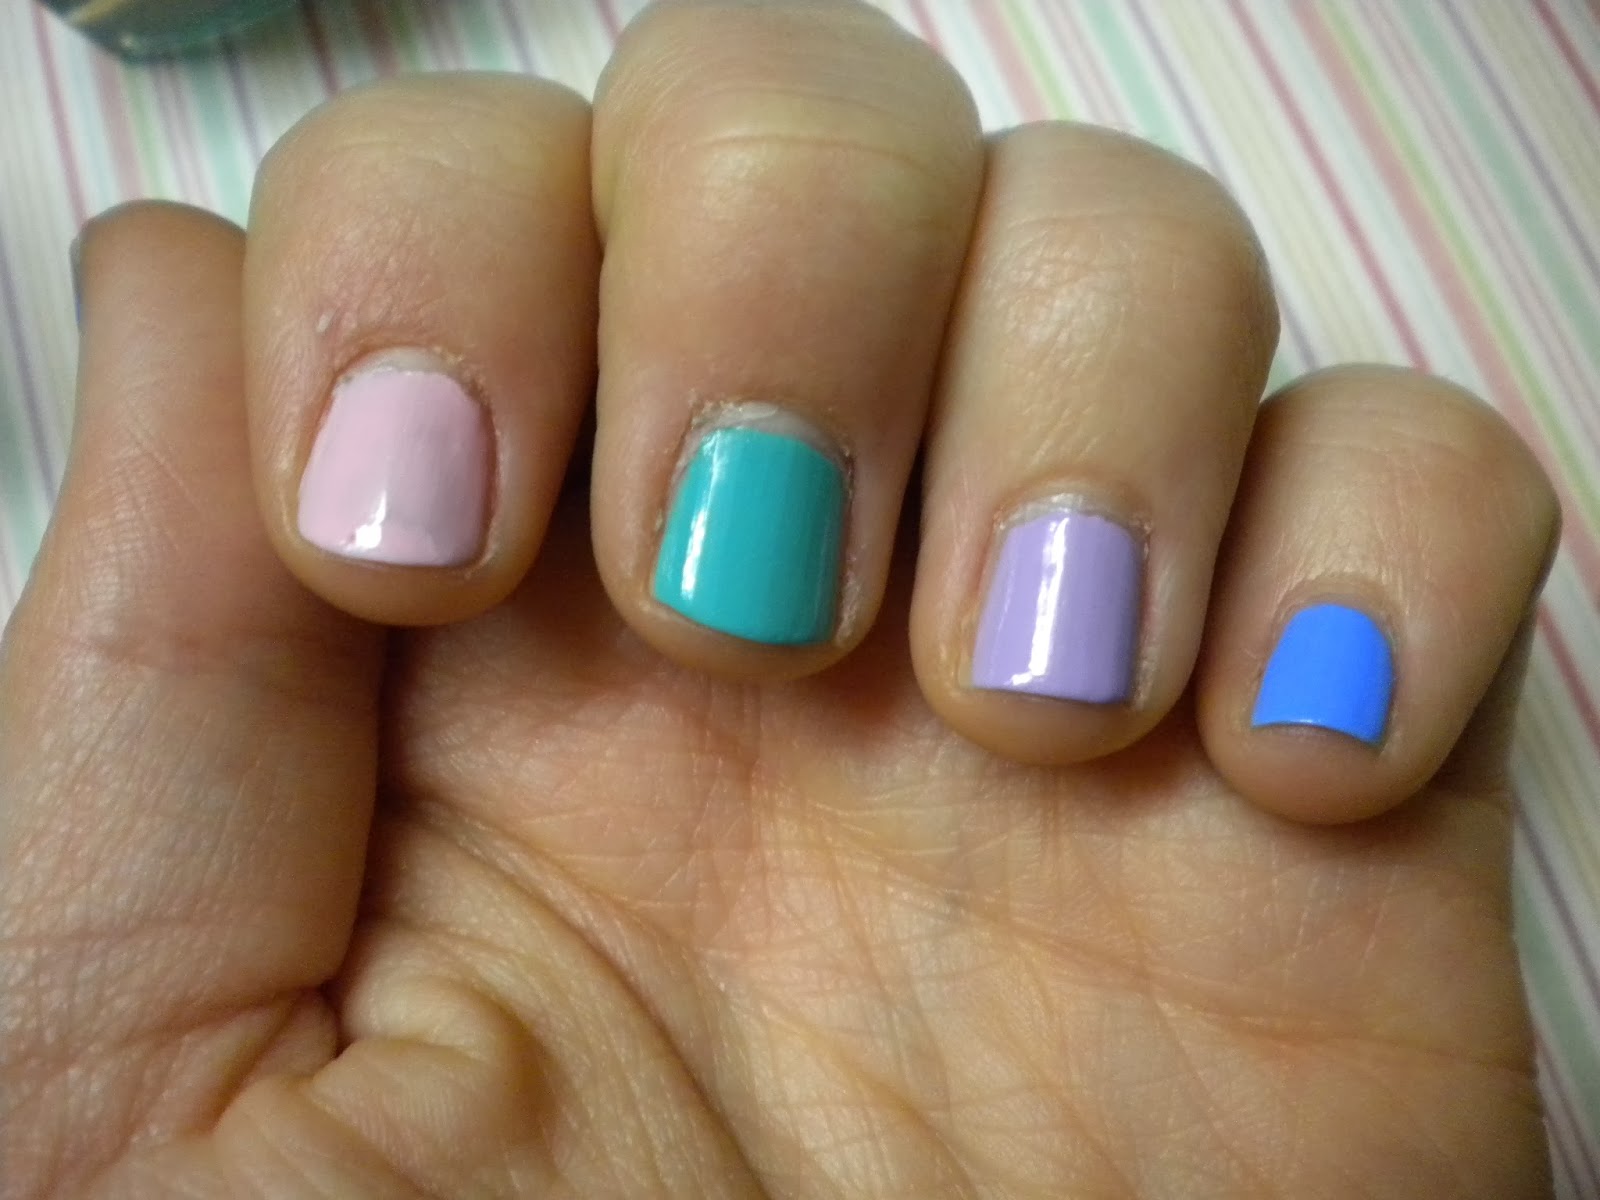
It's no secret that nail art makes rare appearances on this little blog but today is an exception. This is a simple nail art combination which has been used by many nail bloggers so I can't sadly pinpoint where this design came from - it certainly wasn't me! Spring has come to a close soon however my colour choice radar hasn't realised this yet, they are still a great love so they are going to appear today:
Aren't they a cute combination!? Well they are all pastels so they were all going to match anyway. They are 702 Marshmallow Heaven - Rimmel, 100 Pink Blink - Sally Hansen Insta-Dry and Huckleberry - Barry M Gelly Hi-Shine.  So onto the base coat and then the design!

Saturday, 7 June 2014

Flying Visit Nail Art: Pink Blink by Sally Hansen and Snow Me White by Sinful Colors

It's a flying visit today with some nail art but not a lot of text sadly. In my news feed there was some lovely Lace Nail Art by the brilliant Handtastic Intentions, which I just needed to have on my nails therefore an attempt was made:
These polishes are the ones used in this pretty little manicure. They are Pink Blink by Sally Hansen and Snow Me White by Sinful Colors. They were used due to the fact they are complimentary colours! Here's the actual manicure:

Monday, 5 May 2014

Polka Dot Gradient Design - Guest Post!

One of this year's new years resolutions was to stick to a posting schedule so that the lovely readers know what to expect and don't get confused, however today's an exception to this rule. The exception comes in the form of a polka dot gradient design created with the famous dotting tools.

In order to see this little rule breaker post with my little ramblings, you'll have to pop over to the brilliant The Sequined Nail and click on Guest Post: Grace from Addicted to Nails.... It's definitely worth your while as The Sequined Nail has been followed by myself ever since the beginning giving brilliant nail polish designs and inspiration! And finally this doesn't mean you'll be seeing less posts this week as an exception has been made. :)

Saturday, 3 May 2014

WellNailed x's Competition Prizes!!

Today's post is rather exciting despite the fact it's a tad overdue! The reasoning for this is that recently I had given up buying new polishes, therefore new polishes weren't shown on the blog just in case someone got the urge to get new ones if they did well on the blog... So today's going to show you guys what was won in the competition hosted by the brilliant WellNailed x. (Go and check them out!) As well as give some clues as to what will be appearing soon...
These will be the first Nails Inc to be added to the ever growing stash and they are called; Countess road, Lanesborough place, Battersea and Bristol. They haven't been officially tried out yet but Bristol has appeared on my nails and it's already a favourite.

Thursday, 6 February 2014

GOT Challenge: Green

Hello! This week's choosing of a nail polish was an easy peasy decision seeing as the first ever green polish that was purchased is still my favourite one to this day. Although it hasn't been used in a while therefore it was the one to be picked. After that the design was a little tricky but The Sequined Nail's Metallic Spot Gradient definitely inspired this quick little art design over the top!
These are selected nail polishes; NP 284 by Barry M (It's so old it's lost it's name.) and 819 Sublime Plantine by L'Oreal. The combination was due to the fact they are both metallic polishes meaning they'd compliment each other. Barry M will be the base colour as the Challenge is based on green this week and L'Oreal is the nail art colour. Here's the first coat...

Monday, 3 February 2014

What I am wearing...

This is a little bit of a naughty post seeing as I am trying to stick to a new schedule of posting three days a week which was one of the New Year Resolutions so that I don't run out of steam doing this little blog. However I saw Pause For Polishes's What I'm Wearing! post this morning, then thought I'd show the nails I've got on today seeing as it was a first attempt at a gradient.


Aren't they cool!? Not the best ever gradient in the world (that's why this isn't a full blown post) but I'll improve once I have a few more attempts. Nail polishes used where Rose Porcelaine - Maybelline and 185 Sweet Tart by Revlon with Sally Hansen's Insta-Dry as a top coat. Have you guys done any first attempts in nail art recently? :)

Thursday, 30 January 2014

GOT Challenge: Dots

Here I am again with a new week's GOT challenge under the title of dots which was pretty hard to put together seeing as it's the use of old nail polishes and the idea was to create a rainbow of dots. However my collection doesn't hold many old bold colours, therefore I'll show you the oldies first and then the addition back up colours. Is that okay? Hopefully not breaking the rules as I've never been a 'rulebreaker' to be truthful.

Square photographs didn't really seem right and this is the best editing I can do to get close to circles so they are in their own little bubbles. Base colour was Cloudy Grey by Maybelline, the golden oldie polishes are Hibiscus by Natural Collection which is really old and a cheaper polish seeing as that's what pocket money would stretch to and an unknown named polish by Miss Sporty which doesn't have a tag as it was purchased at a car boot sale (Really really old!). Finally the additional colours are Bright Purple by Barry M, Orange Attack by Maybelline Colour Show and 296 Water Street Blue by NYC. Right let's get started with the base coat.
I am starting to like the bubbles of photographs, I promise I wont get too attached to them.  Oh! Before I forget the reason the base colour isn't white is due to the fact that my collection currently doesn't hold a white nail polish.There is a lot going on in this post today, edited photographs and a little movie. Don't get your hopes up too much though. Next stage then is adding the different dots therefore here's the film premiere...

Wednesday, 29 January 2014

January’s Polish Party: January Blues

Today has been explore the lovely nail blogging community day which has been a delight and a pleasure seeing as there are many many brilliant bloggers. They've been showing off all their unique talents in different task and sadly I've seen yet another one which I want to be a part of.... It's called the Polish Party and all the participants post once a month to a particular theme - it's not too strenuous! This month's is January Blues seeing as we all get a little bit low this time of year. So here we go!
Seeing as it's under the theme of January Blues, every nail polish is going to be blue in this little post except from the top coat. Base colour is going to be Savage by Sinful Colors seeing as it's not light or dark so all of the colours on top will show up. It's going to be dotty spotty kind of like January rain which happens a lot. Base coat here we go....
 

Friday, 24 January 2014

Trio of spots!

A simple design of dots to create a great set of nails. I had realised this evening that I hadn't used the spotting tools since the first try out so they came out of their lovely new packet and I thought through some simple ideas then thought of the simplest of them all: a trio. Then the next hard-ish decision was the colours as there are now too many to choose from, if only I could use every colour I own...
Seeing as the amount of nails I have to paint isn't endless, a theme was decided and then a few select colours were chosen. Pastel which includes 270 Lacey Lilac - Sally Hansen, Turquoise Lagoon - Maybelline, 505 Mind The Gap, Victoria - Rimmel and Rose Porcelaine - Maybelline seeing as these colours complemented each other perfectly. This is the first coat:
 

Fitting the pastel theme so far, maybe the blue needs to be a little lighter but that's probably the picky-ness coming through a little too much. This isn't being picky but at this point all of the nail polishes needs another layer seeing as none of them are really opaque enough yet to get the best of the polishes overall...


That's much better for my liking which is probably a little bit picky which is becoming apparent through this little blog... Now as mentioned earlier the design is going to be a trio of dots and relatively simple seeing as it's got to look good on both hands. Not brilliant on one and terrible on the other. Additionally a large dotting tool was chosen so that it would fill the nail polish 'frame' as it were and much easier to get three in a straight line. Hopefully like this:


Making sure all the colours were included in the simple art, the accent dot colour was changed every time so that it was the colour of the nail to the left of it (does that make sense? I am not sure...) Simplicity seems to be the best policy seeing as these came out so well aside from the fact that the lines aren't all straight or perfect, this can only really be seen when looking closely! Who'd be doing that except me!?


Sunday, 19 January 2014

Just couldn't resist!

When I received the striping brushes I made a promise that I'd wait until all the nail art stuff ordered had arrived so that they could be used at the same time. However that didn't happen as they were used in the first GOT challenge, so I said that I'd wait for the last two items to arrive together but yet again that didn't happen.... Dotting tools arrived today and my nails are now dotted and spotted!

These are the Dotting Tools that I ordered which I got from Amazon which came when they said they would and are brilliant so far (A little shorter than expected as I thought they'd be pencil length but there a tad shorter!) as it's totally easy to put dots on your nails on both hands which is a total plus seeing as one hand is normally not as good as the other. For the base, a darker colour was needed but not too dark that the other colours wouldn't show up so 381 Jade Green by Rimmel Pro was chosen.
For the dots, it really needed to be many different colours and in random places so that if it went wrong on the first attempt it wouldn't look too bad I decided. Therefore all the dots are made up of these colours:
Which are; Bright Purple - Barry M, Orange Attack. - Maybelline Colour Show, Savage - Sinful Colors and 325 Hot Gossip - Rimmel Pro. Do you think it's a good combo? Maybe should of added a bright yellow seeing as there are all the other main colours, oh well. Here are the results of the dotting and spotting.


Pretty pleased seeing as it's artist nails which have gone better than I thought they would, the next design I would like to do is like a sunset with dots which I have seen on Youtube by a lovely blogger but I cant remember them - oops and sorry! But overall these nails are really simple to but you do need dotting tools, however there are things you can use from around the house to create this effect such as pins so there's no major need to purchase the tools as I told myself when buying them....

Saturday, 4 January 2014

An attempt at a new year's resolution...

As promised earlier on in the week in my new year's resolutions, I am attempting to do some nail art! (Just to say this isn't my idea, I am starting off by following some ideas of Youtube. This is from MissJenFabulous!) Now before anyone gets too excited, it's not going to be hung in a gallery and really detailed because it's the first one in a hopefully long line of nail art posts. (That is a tad hopeful for me...) It's going to be really simple so that not only other people can do, so that I can do it well also.
The brighter the better, these aren't neon nail polishes just very bright colours. They were all purchased from a £1 shop so I am unsure if these are available in high street shops... They'd be easy to find on Amazon/Ebay or just use a different high street brand. The ones I am using are: 440 Siren, 560 Zealous, 185 Sweet Tart by Revlon and 50 In Record Time by Sally Hansen. First things first, all the nails were painted with one coat of each nail polish on different nails.
 

Like so. Two coats aren't really needed unless the nail polish hasn't covered the nail well enough - but if this happens I'd recommend using another nail polish seeing as the next step is painting on top of the first coat which won't get great effect if it's not opaque enough! Next thing to do was to paint over the top of the first coats in a different colour with three strokes of straight lines which are shorter than each other like this:

Just a reminder this is the first attempt so it isn't that brilliant at the moment but I promise the end result is quite good and different to the normal nail polish reviews. The next step is to do the same but with another colour or the same colour as the first coat in the same design a little bit further down the nail. This is what it should hopefully look like...


Tad da!
Rather bright and in your face design, I have to admit. Also good way to show off the really out there or cool colours together, cool combination would be black, red and gold which hopefully I'll be trying soon. But these colours were brilliant for the designs so I'd definitely recommend them and use them again.


LinkWithin

Related Posts Plugin for WordPress, Blogger...