.JPG)

Showing posts with label Rimmel Pro. Show all posts
Showing posts with label Rimmel Pro. Show all posts
Tuesday, 1 July 2014

Tuesday, 6 May 2014
Another little shopping haul in the infamous £1 shops...
It's become largely apparent that when I go out shopping for the day or afternoon, that the time spent in the £1 shops is too great it's becoming abnormal. Really should cut down on time spent in here, what do you guys think about £1 shops? Do you like my hauls and polishes feature from £1 shops? But need some opinions from you guys before they get cut completely! Anyway onto the post, here's what was snapped up from the £1 shops on my last visit as well as some polishes from another store - shocking that I ventured else where.

Tuesday, 29 April 2014
Bargains at the carboot sale...
Getting up at ridiculous hours before my 9 o'clock shift on a Sunday morning is something I am currently prepared to do in order to get some bargains in return - crazy I know. This is due to a popular thing called a car boot sale where anything and everything can be found. Last Sunday, the early mornings paid off as I managed to find some fabulous nail polish bargains which you may of seen briefly here on my Instagram page... But here's the full low down on what was purchased!
Tuesday, 22 April 2014
Nail Salon Open: Bright Purple by Barry M and 381 Jade Green by Rimmel
Good morning! It's back to the normal week now seeing as the Easter weekend is over - sad face being pulled. Meaning back to work etc. additionally my older sister is returning to her university which is far far away today. But just before she ups and leaves, there's a nail polish installation!
.JPG)


Thursday, 6 March 2014
GOT Challenge: Skittle
Now I've probably mentioned before that I have a current love of the sweets Skittles in any of their flavours, which made me very excited for this week's GOT challenge seeing as I am basing it on the sweets! It's only going to be a flying post but a very colourful one.
 Each colour nail polish has been matched to a flavour, however the flavours cannot be named as these are the Confused? Skittles. The names and how old they are: 460 Orange Couture - Maybelline Forever Strong Pro (Unused), 325 Hot Gossip -Rimmel Lycra Pro (Kind of Golden Oldie), 303 Bright Purple - Barry M (Golden Oldie!), 50 In Record Lime - Sally Hansen Insta-Dry (Kind of Golden Oldie) and Unnamed Yellow - Miss Sporty (Golden Oldie!) So here's the end result:
Thursday, 20 February 2014
Rimmel Pro - Navy Seal
Sorry there's no GOT challenge today, just a simple review! Rimmel Pro is definitely growing in my estimations as well as in quantity within the collection, this is due to how reliable I find it. There's never any real question when looking at in the store that it might be gloopy or runny as previous experience with the brand is fab. That means if I like the colour and the price, I'll buy it. This particular colour isn't an exception to the rule as it's brilliant. (If ever I find a Rimmel Pro that doesn't live up to expectations you'll be the first to know.) Lovely colour and lovely application.

This little beauty is called 411 Navy Seal. It's a brilliant colour due to the fact isn't a normal navy colour - its dark blue but with a slight hint of a grey colour making it slightly different to the vast majority of navy colours. These can sometimes be quite loud in colour, however this one seems lightly less bold and a little bit mute. Well the photographs will speak for themselves...


Tuesday, 18 February 2014
Another little post for your nail polish fix!
Seeing as the first post today wasn't about nail polishes, I thought I'd do a simple review of a polish which is well worn but fab just to give you guys your nail polish fix so that you'll keep going until Thursday. This particular polish was chosen for the colour seeing as I am a major fan of the book series Pretty Little Liars and today is #redcoattuesday!
.JPG) It's not a great surprise that the brand of nail polish is Rimmel Pro as I cannot find fault with any of this particular collection but the colour is 325 Hot Gossip. Definitely fits the colour seeing as your nails become such a statement with this on. Each layer is no exception to this, here's the first...
It's not a great surprise that the brand of nail polish is Rimmel Pro as I cannot find fault with any of this particular collection but the colour is 325 Hot Gossip. Definitely fits the colour seeing as your nails become such a statement with this on. Each layer is no exception to this, here's the first...

Sunday, 19 January 2014
Just couldn't resist!
When I received the striping brushes I made a promise that I'd wait until all the nail art stuff ordered had arrived so that they could be used at the same time. However that didn't happen as they were used in the first GOT challenge, so I said that I'd wait for the last two items to arrive together but yet again that didn't happen.... Dotting tools arrived today and my nails are now dotted and spotted!

 For the dots, it really needed to be many different colours and in random places so that if it went wrong on the first attempt it wouldn't look too bad I decided. Therefore all the dots are made up of these colours:
 Which are; Bright Purple - Barry M, Orange Attack. - Maybelline Colour Show, Savage - Sinful Colors and 325 Hot Gossip - Rimmel Pro. Do you think it's a good combo? Maybe should of added a bright yellow seeing as there are all the other main colours, oh well. Here are the results of the dotting and spotting.


 Pretty pleased seeing as it's artist nails which have gone better than I thought they would, the next design I would like to do is like a sunset with dots which I have seen on Youtube by a lovely blogger but I cant remember them - oops and sorry! But overall these nails are really simple to but you do need dotting tools, however there are things you can use from around the house to create this effect such as pins so there's no major need to purchase the tools as I told myself when buying them....
These are the Dotting Tools that I ordered which I got from Amazon which came when they said they would and are brilliant so far (A little shorter than expected as I thought they'd be pencil length but there a tad shorter!) as it's totally easy to put dots on your nails on both hands which is a total plus seeing as one hand is normally not as good as the other. For the base, a darker colour was needed but not too dark that the other colours wouldn't show up so 381 Jade Green by Rimmel Pro was chosen.Friday, 27 December 2013
Sister's Party Nails - A Lovely Teal.
Seeing as my lovely sister found out about my blog today, she wanted to become a nail polish model for me - which is really good seeing as she has way better nails than me! As my sister is going to a party tomorrow, the colour nail polish was chosen due to the fact it'll colour match her outfit. I like them so much on her, I want to take of my nail polish and put this one on...

It's Rimmel Pro again - Ooops! It looks like I've been on a Rimmel Pro shopping spree but I promise I haven't. The colour is 381 Jade Green with additional Base & Top Coat by Barry M. Colour-wise Jade Green is more blue in colour than bright green personally which is a good thing. No shimmer or matte, just plain colour for a change.


Tuesday, 24 December 2013
Purple Addict - Definitely!
Throughout my later childhood the colour I wore about 90% of the time was ... Purple. This nail varnish sums up my love of the colour as it's dark enough yet also has a metallic shimmer which is always a plus. The name of the varnish by Rimmel Pro is 406 Purple Addict which means it has a lot of expectations to fill especially for me!
 Luckily for me, this nail varnish has a maxi-brush which can be seen on the top of the lid, this makes it really easy to apply your nail varnish and get neat lines along the bottom of your nail. The other types of nail brushes don't get as good a result when I use them... The Application of the nail polish was simple; not gloopy at all, even thickness and no streaks when I painted the nails. Here's the first coat of the nail polish. p.s. I apologise in advance for the not great state of my hands at the moment...


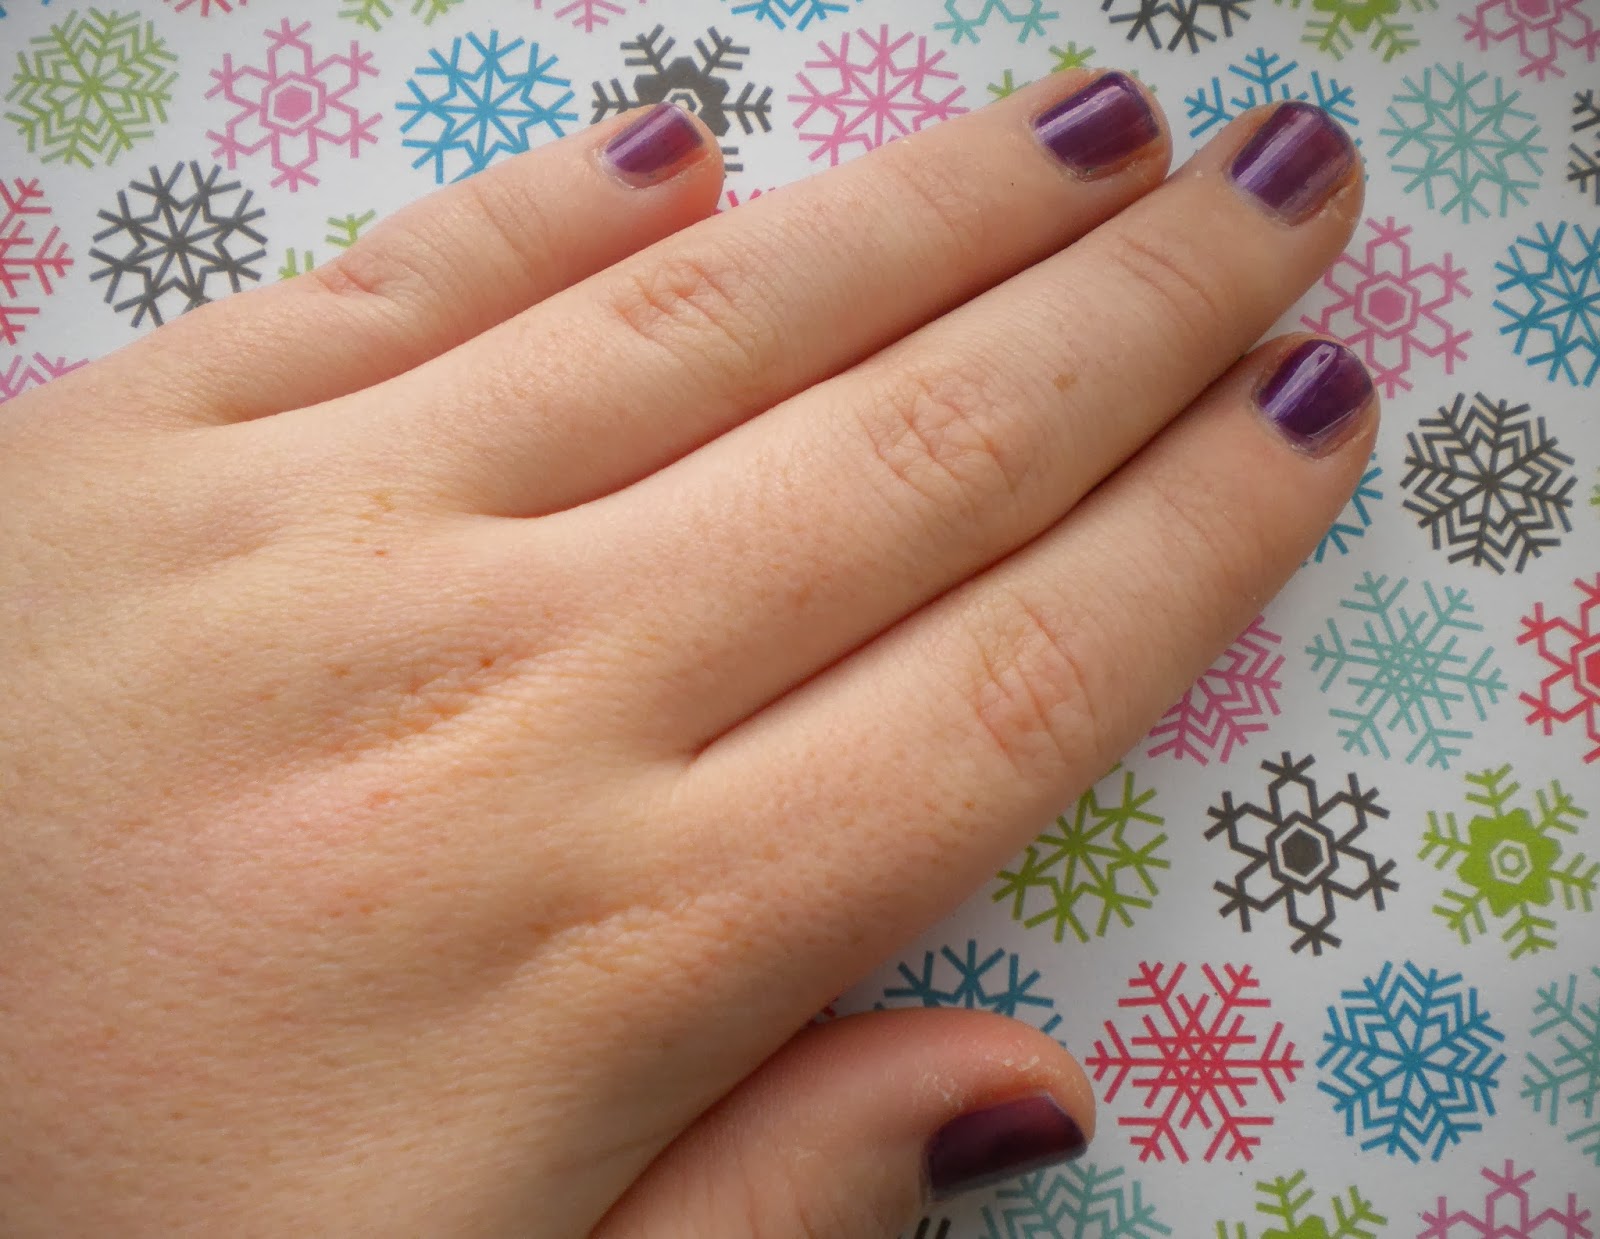

The first layer was a great purple colour yet it looked quite transparent on the nails as you can still see the nails underneath - which I am trying to hide. Therefore another coat was definitely needed to get the best results out of the amazing colour.


A much better result for the nails. Two coats is the best solution for this nail varnish. I haven't worn them all that long so I can't give you guys a review if this particular nail varnish chips but the Rimmel Pro collection I have tried and it definitely stays on for a while without chipping at all so fingers crossed for this one. It also comes off without any markings, so you can repaint your nails afterwards without any showing up. If you're a purple addict, this will calm your addiction to the colour as it's so nice. It has calmed mine!
Tuesday, 17 December 2013
Loving crackle nail varnish a bit too much!
Hello again! As you can probably tell from the title thingy I am going to be posting about crackle nail varnish again... It's just such a simple nail varnish that adds a lot to your set of nails and it's really really easy anyone can do it. The brands I have chosen to show you my new combination is:

OPI in the colour Shatter the Scales and Rimmel Pro in the colour Jade Green which is more green than the picture shows (it comes up very turquoise in this photograph.) The OPI colour was purchased first, none of the colours I had really matched it. Then this colour caught my eye and you just know it'll match underneath the crackle. So here's the first coat.

Goodish coverage bearing in mind it's only one coat so to make the nails look really professional another coat was added...
Fun bit now!! Adding the crackle!!

There you go - instant effect on your nails, I'd have to say that this was brilliant to put on as you could get different range of effects depending on the thickness which you applied. Tip - don't put too much on or it doesn't crackle and you get a big blob on top of the lovely painted nails. Definitely recommend this nail crackle as it was effortless to apply. Finally adding the top coat.

They came out so well, sun came out to show them off to you guys! I'd give a thumbs up to these nail varnish as they were great to put on as they weren't gloopy as well as the nail brushes were practical shapes and also dried very quickly (good for me as I am very clumsy with wet nails...) The crackle is great with other colour combinations as I found out trying with other nail colours after this success.
Monday, 2 December 2013
Crackled Nails: Easy Peasy!
Here's the first how-to/review of crackle nails. When this effect first came out I was amazed by the design, as I thought it was art instead of a polish, yet it's really simple to create. So here's what nail polishes I used...
 As you can see by the brands I am not a big spender but in my opinion they are very good nail polishes especially the clear one from the natural collection at boots. So to start the painting of my nails, I washed my hands to remove all the dirt that's been lurking (Messy day job!) then painted the clear nail varnish to smooth the base for the brighter colours.
The next thing to do is paint the nails with the under colour to the crackle. It my experience bright colours work well but also light shades such as pastels as these types of nail colours oppose the crackle therefore they STAND out. Here's my base coat.
 Looking good so far! I normally do two coats of the base colour as for me it tends to last longer but you can just do one if you want to or just don't have the time for two. The next bit is the fun bit. Putting on the crackle. To get the best results, you have to apply the crackle layer thinly and don't put loads on as this is what happens.


The next thing to do is paint the nails with the under colour to the crackle. It my experience bright colours work well but also light shades such as pastels as these types of nail colours oppose the crackle therefore they STAND out. Here's my base coat.


Big black blobs as it's not thin enough to crackle. This means (In my case...) that the nail has to be redone to get a much better effect. Here's a good set of nails.

Then all you have to do now is clear top coat...

That is a good looking set of nails completed which doesn't require any artist skill :) As for the review part of the post which is that the Barry M black crackle nail varnish is in my opinion very good as you have the ability to vary the size of the crackle. Also it doesn't crackle when left so much that you can't use it at all which is beneficial!
Subscribe to:
Posts (Atom)
LinkWithin
