Showing posts with label Teal. Show all posts
Saturday, 29 November 2014
Refreshing and Bright: Barry M's Kiwi
Putting this post together has definitely reminded myself of NYC's Peacock as I thought they looked really similar, then looked at the actual post and realised they aren't very similar in colour at all. Maybe loosing my nail polish colour radar! Anyway onto today's polish, it's Barry M's Kiwi as it's been show a few times in some nail art but not by itself. And it should be, so here it is all on it's lonesome:
Tuesday, 14 October 2014
Trying a Different Brand: NYC's Peacock.
NYC isn't a new brand to myself, it's been tested before and the results from the polish which only cost £1.79 have been very unexpected. Other brands have been shining brighter than NYC on previous shopping trips, so it's been ignored. But yesterday NYC (Is that what it's called? Or is it something else...) was calling out and a few where picked up on the buy one get one half price deal. Here's the very pleasing results:
Tuesday, 17 June 2014
The Sugar Coats Return: 250 Spare A Mint?
Today's a swatch day and it's a reappearance from one of the many notorious Poundshop hauls that I've secretly been on. As well as this it's a returning favourite of mine which has been featured heavily in the past - even had a mini series found here. It's the Sugar Coat polishes!
This lovely looking teal polish is called 250 Spare A Mint? by Sally Hansen in the Sugar Coat collection. As mentioned it's teal nail polish that's a tad darker than the normal teal colours as it's more on the blue than green-ish side. It's a special effect polish due to the fact it's texturized to look like your nails have had a coating of sugar on them! Let's get onto the swatches which we are all here for:Thursday, 17 April 2014
Spring Colour Recommendations - Guest Post
It's spring finally so I've done a little post on colour choices for your nails this time of year, instead of the usual GOT challenge. Hopefully it'll brighten up your day as they are very sweet colours and there in skittle manicure formation!
Now today's full post requires a little bit of work on your half, as it's a guest post on Em's Little Corner in this lovely little post Guest Post by Grace from Addicted To Nails... so why don't you head on over?
Labels:
Blue,
Forever Strong Pro,
Maybelline,
NYC,
Pastel,
Pink,
Purple,
Rimmel,
Sally Hansen,
Teal,
Xtreme Wear
Thursday, 3 April 2014
GOT Challenge: Pastel
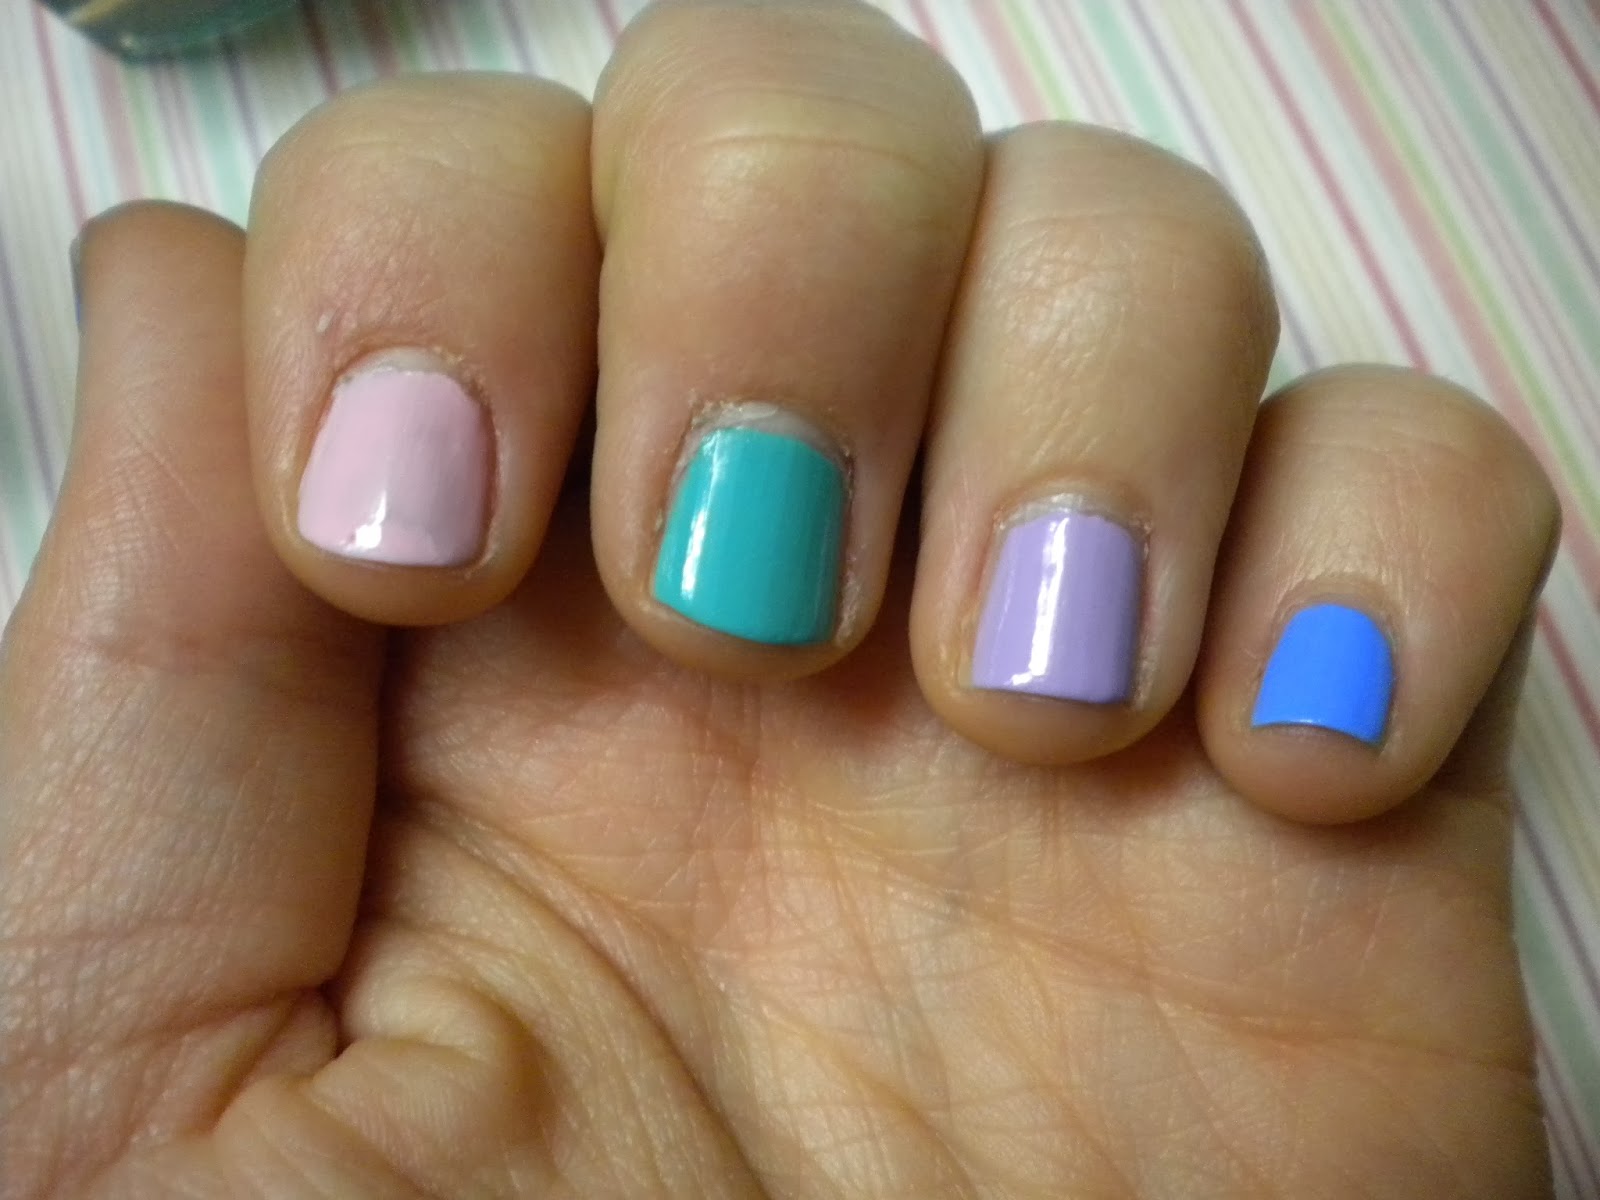
Hello, it's that time of the week again! But it's going to be rather a quick post seeing as I've got to go out again in just a moment - sorry. Today's theme is pastel which is quite surprising that it's gone so well as normally these colours aren't picked first when buying. However today has three very complimentary colours:
The names of these lovely polishes are; 503 Mind The Gap, Victoria by Rimmel 60 Seconds, 145 Porceline Pink by Maybelline Forever Strong and 320 Blue Sky by NYC in a minute. When planning this little post it was decided seeing as the last few that I could remember were basic colours, I'd add some spots on to the nails at the end!
Labels:
£1 Shop,
Blue,
GOT Polish Challenge,
Maybelline,
NYC,
Pastel,
Pink,
Rimmel,
Teal
Saturday, 1 March 2014
Is there such a thing as too opaque?!
There is a major downside to taking and organising photographs for the posts in advance of the writing as I have just found out, seeing as I am quite lazy I took all the photographs I needed and just uploaded to the computer without any real care... This was a major mistake as the nail polish which is being reviewed in this little post is so opaque in the first coat that I cannot distinguish the first and second coat photographs apart!
The major catastrophe has been avoided seeing as the photographs have time taken in the information box which means they have been separated but it just shows what good coverage of the nails this little bottle has in one coat. This is 700 Block Your Green by Rimmel, it was found in a sale box in the local high street beauty shop which is probably an indication that it may be going out of line soon as there aren't any faults with it - however I may be wrong...
Friday, 24 January 2014
Trio of spots!
A simple design of dots to create a great set of nails. I had realised this evening that I hadn't used the spotting tools since the first try out so they came out of their lovely new packet and I thought through some simple ideas then thought of the simplest of them all: a trio. Then the next hard-ish decision was the colours as there are now too many to choose from, if only I could use every colour I own...
Seeing as the amount of nails I have to paint isn't endless, a theme was decided and then a few select colours were chosen. Pastel which includes 270 Lacey Lilac - Sally Hansen, Turquoise Lagoon - Maybelline, 505 Mind The Gap, Victoria - Rimmel and Rose Porcelaine - Maybelline seeing as these colours complemented each other perfectly. This is the first coat:
Fitting the pastel theme so far, maybe the blue needs to be a little lighter but that's probably the picky-ness coming through a little too much. This isn't being picky but at this point all of the nail polishes needs another layer seeing as none of them are really opaque enough yet to get the best of the polishes overall...
That's much better for my liking which is probably a little bit picky which is becoming apparent through this little blog... Now as mentioned earlier the design is going to be a trio of dots and relatively simple seeing as it's got to look good on both hands. Not brilliant on one and terrible on the other. Additionally a large dotting tool was chosen so that it would fill the nail polish 'frame' as it were and much easier to get three in a straight line. Hopefully like this:
Making sure all the colours were included in the simple art, the accent dot colour was changed every time so that it was the colour of the nail to the left of it (does that make sense? I am not sure...) Simplicity seems to be the best policy seeing as these came out so well aside from the fact that the lines aren't all straight or perfect, this can only really be seen when looking closely! Who'd be doing that except me!?
Labels:
£1 Shop,
Blue,
Maybelline,
Nail Art,
Pink,
Purple,
Rimmel,
Sally Hansen,
Teal
Sunday, 19 January 2014
Just couldn't resist!
When I received the striping brushes I made a promise that I'd wait until all the nail art stuff ordered had arrived so that they could be used at the same time. However that didn't happen as they were used in the first GOT challenge, so I said that I'd wait for the last two items to arrive together but yet again that didn't happen.... Dotting tools arrived today and my nails are now dotted and spotted!
For the dots, it really needed to be many different colours and in random places so that if it went wrong on the first attempt it wouldn't look too bad I decided. Therefore all the dots are made up of these colours:
Which are; Bright Purple - Barry M, Orange Attack. - Maybelline Colour Show, Savage - Sinful Colors and 325 Hot Gossip - Rimmel Pro. Do you think it's a good combo? Maybe should of added a bright yellow seeing as there are all the other main colours, oh well. Here are the results of the dotting and spotting.
Pretty pleased seeing as it's artist nails which have gone better than I thought they would, the next design I would like to do is like a sunset with dots which I have seen on Youtube by a lovely blogger but I cant remember them - oops and sorry! But overall these nails are really simple to but you do need dotting tools, however there are things you can use from around the house to create this effect such as pins so there's no major need to purchase the tools as I told myself when buying them....
These are the Dotting Tools that I ordered which I got from Amazon which came when they said they would and are brilliant so far (A little shorter than expected as I thought they'd be pencil length but there a tad shorter!) as it's totally easy to put dots on your nails on both hands which is a total plus seeing as one hand is normally not as good as the other. For the base, a darker colour was needed but not too dark that the other colours wouldn't show up so 381 Jade Green by Rimmel Pro was chosen.For the dots, it really needed to be many different colours and in random places so that if it went wrong on the first attempt it wouldn't look too bad I decided. Therefore all the dots are made up of these colours:
Which are; Bright Purple - Barry M, Orange Attack. - Maybelline Colour Show, Savage - Sinful Colors and 325 Hot Gossip - Rimmel Pro. Do you think it's a good combo? Maybe should of added a bright yellow seeing as there are all the other main colours, oh well. Here are the results of the dotting and spotting.
Pretty pleased seeing as it's artist nails which have gone better than I thought they would, the next design I would like to do is like a sunset with dots which I have seen on Youtube by a lovely blogger but I cant remember them - oops and sorry! But overall these nails are really simple to but you do need dotting tools, however there are things you can use from around the house to create this effect such as pins so there's no major need to purchase the tools as I told myself when buying them....
Labels:
Barry M,
Blue,
Nail Art,
Orange,
Purple,
Red,
Rimmel Pro,
Sinful Colors,
Teal
Friday, 17 January 2014
Hopeful of summer nail polish...
Whilst doing my nails for the little blog, I've realised that I am probably too hopeful that summer is on it's way slowly but surely as all the colours which have been picked at the moment are pastel and bright which are meant to be summer colours. Probably trying to avoid the fact that it's not even spring yet, we are still in winter and will be for a while...
Monday, 6 January 2014
Yet another Sally Hansen nail polish... Oops!
They are just so nice and they not that expensive is probably the though going through my head when I buy yet another Sally Hansen nail varnish which isn't that different to other nail polish I have squirreled away in my ever growing collection of nail polish. So I might as well make some good use out of it by reviewing it and then others out there in the world could possibly benefit from this little blog.
Steal The Base is the name of this nail polish. The photograph definitely does the colour justice seeing as it's a blue/teal colour with a little bit of shimmer in it, a colour which I am not lacking in at the moment. More about the application of this in a minute...
The application of the first layer of polish was brilliant due to the solution going on really well to the nail, very very opaque (you could of left it with one coat) and even coverage all over due to a good brush in the nail polish. However the only niggle I have with this brush is the length of the plastic bit it's attached to as when your dipping it back into the nail polish, it gets impractical and annoying. But that's tiny.
After that additional and probably not needed layer, my nails look really good and the colour looks really nice as it's the same consistency all over! These are going to be left on for a few days to see how well they stay on without chipping so I'll have to get back to you on that. ... I have now worn this nail polish for a few days to test it out and I have to say that even though I have been doing loads of different things, my nails haven't chipped badly at all which I was kind of expecting them to do. Only real downside is that the nail polish colour does mildly stain the nails which can be seen once the nail polish is removed. But it's not really major staining, I promise!
Steal The Base is the name of this nail polish. The photograph definitely does the colour justice seeing as it's a blue/teal colour with a little bit of shimmer in it, a colour which I am not lacking in at the moment. More about the application of this in a minute...
The application of the first layer of polish was brilliant due to the solution going on really well to the nail, very very opaque (you could of left it with one coat) and even coverage all over due to a good brush in the nail polish. However the only niggle I have with this brush is the length of the plastic bit it's attached to as when your dipping it back into the nail polish, it gets impractical and annoying. But that's tiny.
After that additional and probably not needed layer, my nails look really good and the colour looks really nice as it's the same consistency all over! These are going to be left on for a few days to see how well they stay on without chipping so I'll have to get back to you on that. ... I have now worn this nail polish for a few days to test it out and I have to say that even though I have been doing loads of different things, my nails haven't chipped badly at all which I was kind of expecting them to do. Only real downside is that the nail polish colour does mildly stain the nails which can be seen once the nail polish is removed. But it's not really major staining, I promise!
Friday, 27 December 2013
Sister's Party Nails - A Lovely Teal.
Seeing as my lovely sister found out about my blog today, she wanted to become a nail polish model for me - which is really good seeing as she has way better nails than me! As my sister is going to a party tomorrow, the colour nail polish was chosen due to the fact it'll colour match her outfit. I like them so much on her, I want to take of my nail polish and put this one on...
It's Rimmel Pro again - Ooops! It looks like I've been on a Rimmel Pro shopping spree but I promise I haven't. The colour is 381 Jade Green with additional Base & Top Coat by Barry M. Colour-wise Jade Green is more blue in colour than bright green personally which is a good thing. No shimmer or matte, just plain colour for a change.So sorry about the lighting, these were taken in the evening meaning not brilliant lighting in the little house. Application was good, made use of the wide brush supplied with the varnish. Even coverage most of the time with a few teeny tiny streaks. However it does dry fairly quickly, this being the first layer as it's not completely opaque another layer and top coat needs to be added.
Much better colour and coverage (and much better lighting for you guys.) Therefore brilliant nail polish so far, I've just consulted my sister with her manicure and apparently it doesn't chip bearing in mind she's been trying to chip it to test it out. As I have probably said previously is that this collection is a definite recommend as the application and wear is brilliant. And finally the colour is lovely especially on my sister's nails who was a fab nail polish model...
Tuesday, 17 December 2013
Loving crackle nail varnish a bit too much!
Hello again! As you can probably tell from the title thingy I am going to be posting about crackle nail varnish again... It's just such a simple nail varnish that adds a lot to your set of nails and it's really really easy anyone can do it. The brands I have chosen to show you my new combination is:
OPI in the colour Shatter the Scales and Rimmel Pro in the colour Jade Green which is more green than the picture shows (it comes up very turquoise in this photograph.) The OPI colour was purchased first, none of the colours I had really matched it. Then this colour caught my eye and you just know it'll match underneath the crackle. So here's the first coat.
Goodish coverage bearing in mind it's only one coat so to make the nails look really professional another coat was added...This colour looks brilliant by itself (at this point I was tempted to leave it but I wanted the crackle also, so I carried on.) It's really deep green colour as the name suggested, a great colour also for this time of year as it's cold but not cold enough yet for me personally to go for the browns and navys. It brightens up your feeling in comparison to the bleak weather.
Fun bit now!! Adding the crackle!!
There you go - instant effect on your nails, I'd have to say that this was brilliant to put on as you could get different range of effects depending on the thickness which you applied. Tip - don't put too much on or it doesn't crackle and you get a big blob on top of the lovely painted nails. Definitely recommend this nail crackle as it was effortless to apply. Finally adding the top coat.
They came out so well, sun came out to show them off to you guys! I'd give a thumbs up to these nail varnish as they were great to put on as they weren't gloopy as well as the nail brushes were practical shapes and also dried very quickly (good for me as I am very clumsy with wet nails...) The crackle is great with other colour combinations as I found out trying with other nail colours after this success.
Subscribe to:
Posts (Atom)